Introduction
We were commissioned by a client recently to develop several proof of concepts around functionality offered in recent versions of Adobe/Day CQ5. One of such areas that I had the pleasure of working on was the CQ5 user segmentation and personalization functionality. I thought it might be good to share what I did in hopes that it would save others time when you need to exploit this functionality on your own.
One of my goals with this POC was to leverage as much out of the box as possible to keep the POC effort minimized while still being able to describe and show how the segmentation and personalization features work. From there, our client could then use it as a basis to see how it could be used for their online marketing efforts. User personalization and segmentation in concept is not anything new. Online marketers have segmented their users and personalized content for these users for some time now. However, in many cases a developer probably had to build something custom to provide this functionality to their content authors and ultimately to the end users. With CQ5.3, user segmentation and personalization is part of the Marketing Campaign Manager which is baked into the authoring interface allowing marketers to easily create and monitor their own campaigns without any custom code.
NOTE: I am not a web designer. The goal here is to show how user segmentation and personalization works with CQ5, not to show off my [poor] designer skills :-).
Campaign Overview
The campaign we are going to create will target content based on user profile information. Our use case is simple: when a user has designated that their preference is to use Apple's Mac laptop, we'll target Mac related content. If the user has designated their preference to be Windows based laptops, then we'll target Windows based laptop content.
Note that there are endless possibilities for properties that could be input to a campaign. We are using actual user profile properties, but it could be an IP address range, user's browser history or anything else that can be retrieved/specified as a parameter in a web application.
Our goal is to create a campaign that targets the following audiences:
- Adults who prefer Mac
- Teens who prefer Mac
- Adults who prefer Windows
- Teens who prefer Windows
Step #1: Create Campaign Container
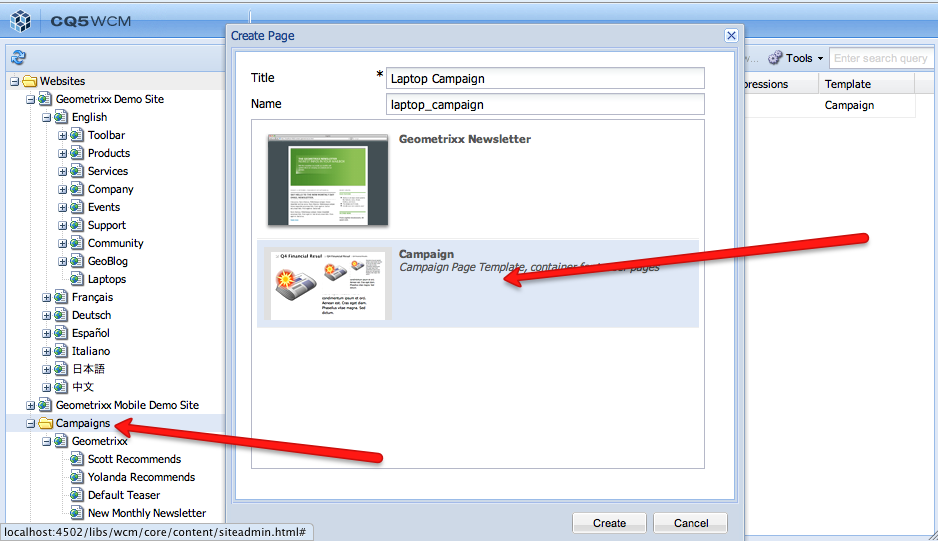
First, let's create a campaign container. A campaign container organizes similar campaigns together, but also is used when setting the scope of the campaign when configuring a Teaser component (to be seen later). Goto the web sites explorer, click the Campaigns folder and then add a new Page and select "Campaign" as the template.
Step #2: Create Teaser Containers
Once we have a campaign created, we will create four teasers that will make up our campaign.
- Mac for Teens
- Mac for Adults
- Windows for Teens
- Windows for Adults
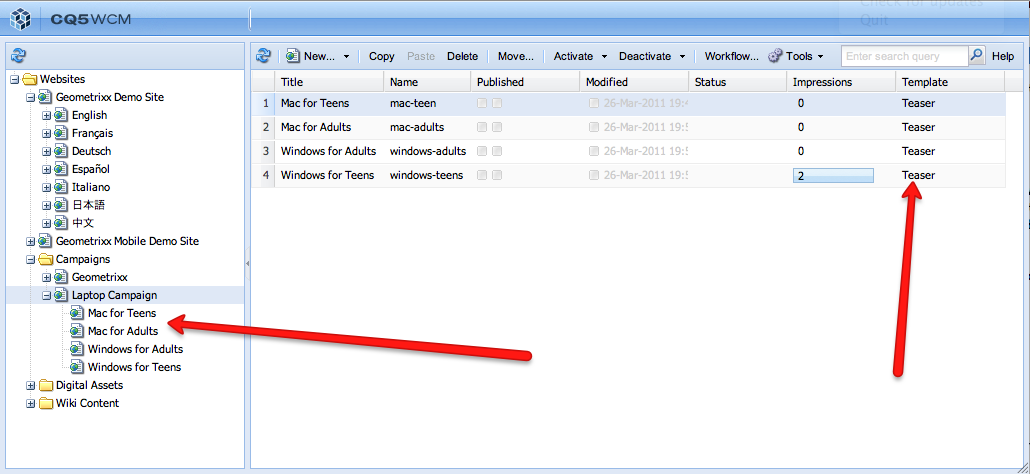
These are the containers which we will add our targeted content to based on how the user is segmented per the rules we define in the next step.
Step #3: Create the Segments
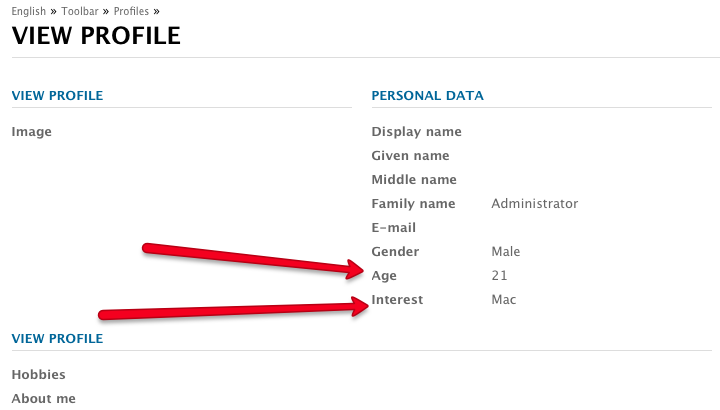
A segment is where we write the rules to show certain content based on a user profile property, user clickstream, etc. We will create four segments all based on out of the box user profile properties:
- User's interest is Mac and age is younger or equal to 19
- User's interest is Mac and age is older than 19
- User's interest is Windows and age is younger or equal to 19
- User's interest is Windows and age is older than 19
A sample author screen for creating one of the segments is shown below:
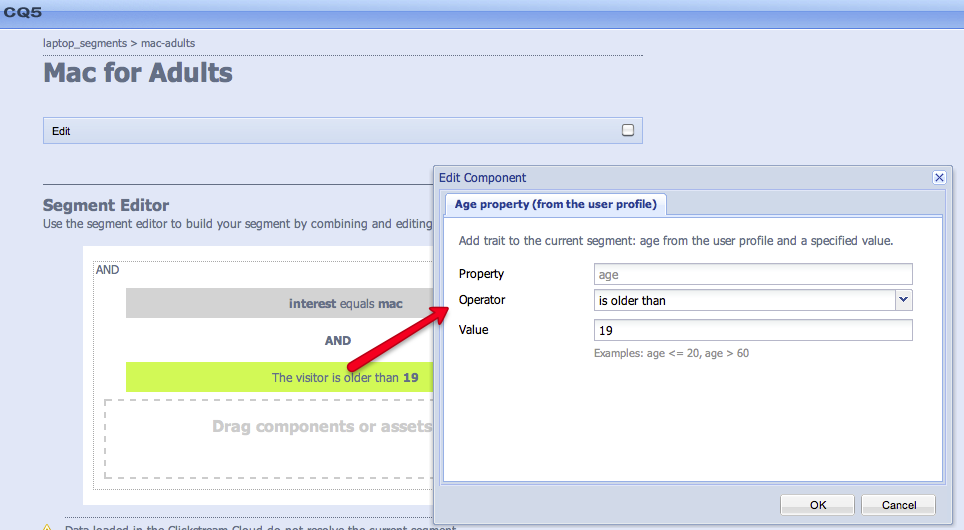
These segments will allow us to target content to teenagers who prefer Mac or Windows and also adults who prefer Mac or Windows. We will have a composite message based on these two user properties.
Note in the image above that the age segmentation has been met as it is colored green. It is based on the user that was logged in when I was creating the campaign (the admin user in this case).
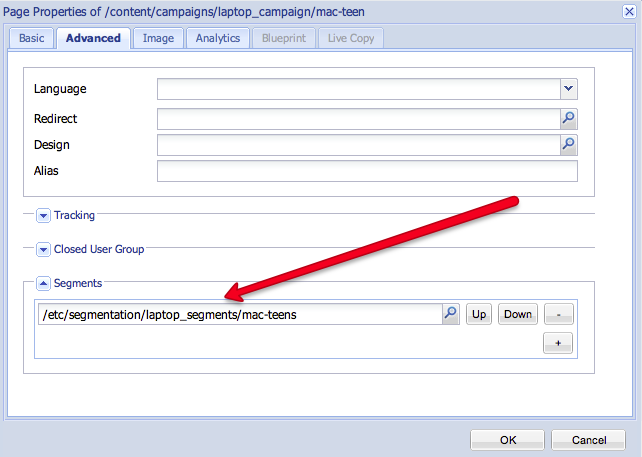
Step #4: Link Segments to Campaigns
Go to each campaign (from Step #2), edit the Properties just like you would modify the properties of a page and click on the Advanced tab. Select the segments that apply to the campaign. You can have multiple segments drive the same campaign if you would like. For our case, we will be using a single segment to drive each campaign. Also take note that your campaign can also have on/off date & times just as any CQ5 page.
At this time we have have "wired up" our campaign, now let's have some fun and create the targeted content for each segment.
Step #5: Add Content to Teasers
Go back to the Web Sites explorer interface and drill down into Campaigns->Laptop Campaign page. Double click on each of the Teasers we created in Step #2, adding your personalized content based on a user's interest and age. Here is one example:
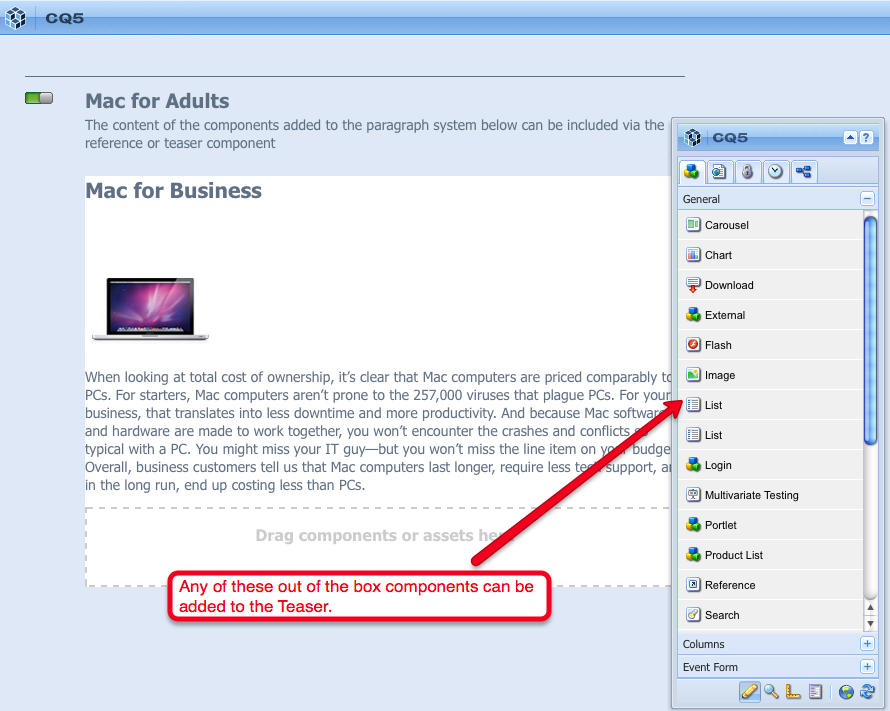
I think this is the most powerful feature of the personalization and segmentation engine in CQ5. The Teaser container can accept any type of component opening up the possibilities to very complex and custom components. Imagine having a component that does IP geographic detection and then based on this information show localized and/or regionalized content for the user. Or perhaps the person visiting has been identified as a lead previously. When the user comes back to your site, you could do a lookup against say SalesForce, find out where they are in the sales pipeline and then target content based on this information. The sky is the limit for what you can put into the teaser container including integrating with enterprise systems that provide input into the segmentation execution logic.
Step #6: Create a Page for the Campaign
We need to create a page in which the campaign will be run. Typically, this is your site's home page or perhaps an extranet home page which targets content after a user has logged in. Drag a Teaser component from the side kick. Double click on this Teaser component and set the configuration per the screen capture below:
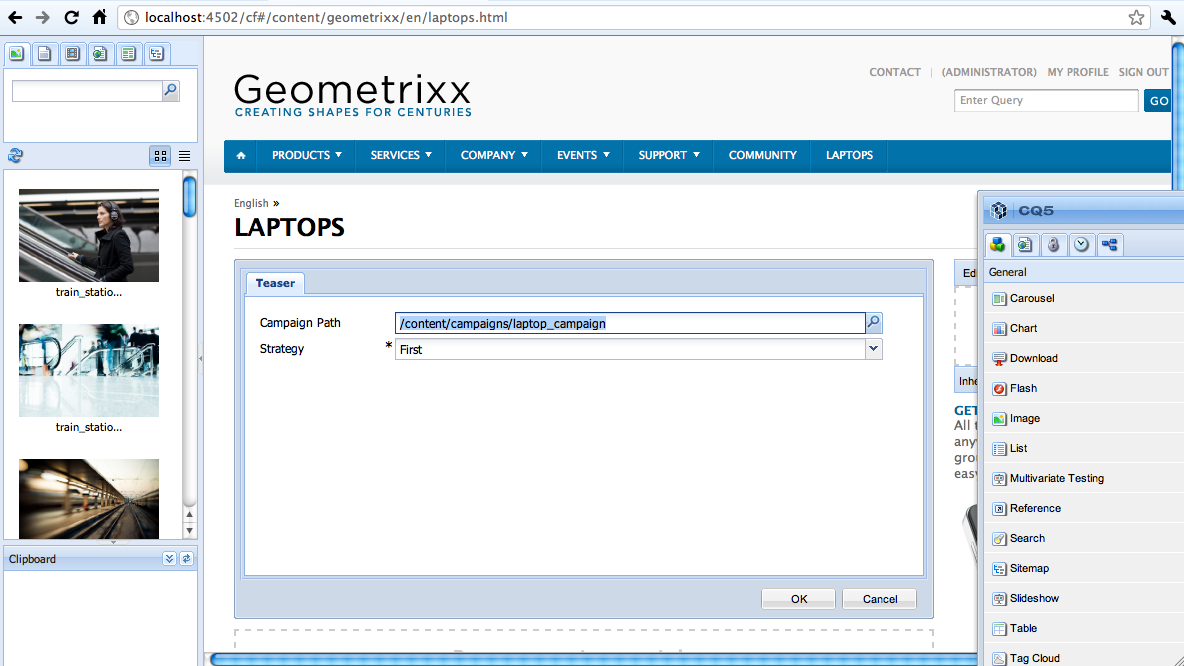
The first parameter is the path to the campaign container we created in step #1. The Strategy parameter is powerful. It allows you to set the strategy how the teasers will be displayed (First, Random, Clickstream Score). We will keep it simple and use First.
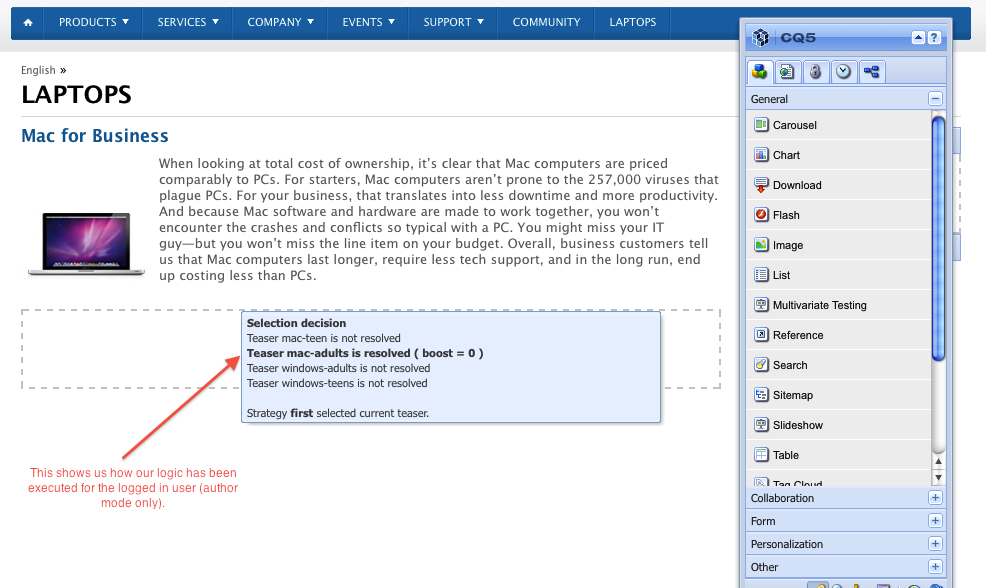
Step #7: Test the Campaign
It is quite simple to test your campaign. Login with a valid user (default admin user will work), setup your profile (you will need to add a drop down input element for the interest) and then goto the page created in Step #7 and you should see the content targeted for the age and interest profile properties you have set in your profile. Also, while you are in author mode, you can hover over the Teaser component on your campaign page (i.e. what you created in Step #7) to see how the segmentation logic executed.
Conclusion
As you can see, implementing personalization using a user segmentation strategy is quite simple and powerful in CQ5. Here, I used all out of the box components with simple logic, but imagine what you could do with sophisticated logic and custom components to segment and personalize content for users visiting your site. Please feel free to contact me if you have any questions or if we can help segment and personalize content for your site's visitors.We were commissioned by a client recently to develop several proof of concepts around some of the functionality offered in recent versions of Adobe/Day CQ5. One of the areas that I had the pleasure of working on was a simple use case for showing how the CQ5 user segmentation and personalization works. I thought it might be good to share what I did in hopes that it would save others time when you need to exploit this functionality on your own.